Anatomy of a 1CC #3: Deathsmiles II
Dec. 28th, 2024 03:18 pmAs I've covered previously, Deathsmiles was a big success for developer Cave when it was released in 2007. DS: Mega Black Label followed the next year, but a full-on sequel was only a matter of time away, and in 2009 arcade-goers were treated to Deathsmiles II: Makai no Merry Christmas, because what better way to follow up Halloween: The Shmup than with Christmas: The Shmup?
Unlike Cave's other games going back to 2004's Mushihimesama, which were powered by the CV1000 hardware, DSII ran on an all-new PC-based system and featured real-time 3D graphics for the first time in a Cave shmup. How did that work out? This was the only game to run on this hardware, and if I'm being generous, it looks to be visually on par with a Dreamcast game. Oh well.
But is there a good game underneath the lacklustre presentation? It's time to take a look at how an 11-year-old girl, her pet bat, and her magic scissors saved Christmas.
The controls are the same as the original: shoot left, shoot right, and bomb. Both shot buttons activate your power-up if it's available, and your lock shot if it's not. What's changed is the way in which your power-up is charged up. There are three different kinds of item - red rings, which are spawned by attacking with your normal shot and which build up your main counter (up to a maximum of 1,000, at which point your power-up becomes available), blue rings, which build up your sub-counter (the number added to the point values of items during a power-up, up to a maximum of 10,000 - and unlike the original DS, you keep it after your power-up ends) and silver rings, which build up both counters. Depending on your character, your option's shot will also spawn items.
A word of warning: compared to the original, information on this game - in English, at least - is much harder to come by. There's a very bare-bones page for the game on the Shmups Wiki, and a brief strategy guide posted on the Cave-STG forum (cross-posted to the Shmups Forum), but there are a lot of details missing, and as such, some of what you'll see here is guesswork on my part.
Anyway, on with the show:
0:00 - There are four selectable characters; Casper and Windia return from the original DS, and are joined by newcomers Supe and Lei.
0:10 - A quick introduction to the plot before the first stage. Satan Claws has attacked Mr Dior and made off with theseven Dragon Balls five Wishing Notes, and it's up to our heroes to get them back before he can make a wish.
0:43 - From time to time, there are enemies in the background that can only be attacked with the lock shot.
0:48 - Casper is particularly good at leeching items off enemies.
1:00 - When your main counter is at 1,000 and you're ready to power up, some enemies release revenge bullets that can be absorbed by your option and converted into blue rings, at a cost of 1 to your main counter.
1:03 - For the first couple of stages, I use the power-up mainly for defensive purposes - as if it was an extra bomb. You'd think that this is the optimal way to play through the entire game if you're just going for a 1CC, but there are score-based extends at 40 million and 100 million - the latter of which takes a little effort to reach. The Detritus stage is particularly lucrative, and you definitely want to take advantage of that. (And in any case, the revenge bullets mean that you'll be activating your power-up pretty quickly if you're playing for safety.)
1:47 - Joy to the world, the boss has come... Whereas the original DS had a giant cow, DSII has Lily the giant reindeer, ridden by Satan Claws.
1:52 - When using your focus shot, you have an aura around your character which deals extra damage at close range, similar to the Dodonpachi series. This comes in very handy in boss battles.
2:55 - You know how in the early '80s, before they settled on calling parts of a game "levels" or "stages", they would use all sorts of different terms such as "boards", "patterns", "racks", "waves", and so on? Well, Cave is reviving that tradition by referring to this game's stages as "fields". All joking aside, DSII keeps the non-linear structure of the original, although there's no difficulty selection this time. In this run, I'm going to be boring and play the stages in B -> C -> D order.
3:00 - Not a whole lot to say about this stage - at least not until I reach the boss.
4:43 - I use a power-up for safety purposes as the falling masonry is surprisingly tricky to avoid (even though it only does half a point of damage).
5:06 - A planned bomb, as this is a relatively difficult pattern to dodge.
5:50 - Up until now I've activated my power-up whenever it's available and when there are revenge bullets on screen, but here (and for the rest of the game, pretty much), I'm going to make an effort to build up my sub-counter before doing so, to extract more value from my power-up. This is easy to do here, as these platforms act like the falling rocks in the volcano stage in the original DS, as you can leech copious amounts of items from them.
6:04 - With the sub-counter at over 6,000 and a cloud of revenge bullets approaching, I decide now is the time to cash in.
6:25 - Thanks to these platforms, it takes just a few seconds to recharge after my power-up ends.
7:01 - After entering the stage with just over 11 million, I obtain the 40 million extend.
7:19 - Another planned bomb - but if I destroyed it with my lock shot (and if I didn't already have full life), I would have picked up a half-point life refill.
7:36 - I find that Casper handles this boss particularly well.
7:51 - That said, I activate my power-up here as these rocks have caught me out on quite a few occasions.
8:34 - One benefit of clearing the previous boss so quickly is that my sub-counter starts the next stage at over 4,000 - it counts down quickly during boss battles, and is halved upon starting a new stage. As a result, I'll be able to make that much more progress towards the 100 million extend.
8:54 - This is the first hit I take all game.
9:44 - There's another life-up item available here if I kill this knight with the lock shot - but I actually didn't know about it at the time I played this.
10:31 - The first death of the run, thanks to an enemy collision. That life-up item sure would have come in handy here, right?
10:53 - The "Nice Older Man", Tamecos, arrives on the scene. How will he aid Casper on her quest?
10:55 - Uh... that's not very nice at all!
11:08 - MEEEEEHHHHHHHHHHHH
11:59 - The normal way to handle this attack is to quickly go over Tamecos' head, move to the left-hand side, and return to the bottom-right - but because there are a few bullets remaining from the previous wave of this attack, I decide to play it safe and use a bomb here (although in hindsight, this was not difficult to dodge).
13:32 - After a quick cutscene, the final stage begins.
13:47 - I hope you enjoy seeing chess pieces blow up, because those are the only emeies you'll see for the next three minutes or so.
14:21 - The power-up is available once again, but with the second extend still to be collected, I am holding off on using it until I have a good sub-counter - at least 5,000. To handle the revenge bullets until then, I position Casper's option in front of her with the focus shot, and keep it there to absorb bullets while using my normal shot.
14:42 - With 21 million until the extend, I activate the power-up.
14:59 - The power-up ends - still just over 12 million to go. Still plenty of time, though...
15:03 - It's getting a bit hectic, so I use my last bomb.
15:27 - The power-up is back on deck. I wait for some revenge bullets to appear...
15:32 - ... and activate.
15:48 - After this power-up ends, I'm just over 2 million away from the extend.
15:59 - I quickly charge up another power-up, and with the sub-counter at 10,000, the second extend is in the bag.
16:15 - Thanks to all the items I leeched off the high-HP enemies during that power-up, I gain over 20 million points. Either way, I can now go back to using my power-up more defensively.
16:45 - Entering the final stretch before Satan Claws now - with four lives, it's looking good.
17:04 - Staying close to the snake to kill it more quickly, and in so doing, avoid its tricky second pattern.
17:30 - Same deal for the second snake.
17:46 - Finally, we have reached Satan Claws. Let the epic struggle for the last Wishing Notes begin...
18:10 - ...well, actually, it proves to be a bit anticlimactic. On the surface, Satan Claws - particularly his second form - is a significant leap in difficulty compared to the rest of the game. But once you're aware that you can do more damage by point-blanking, he goes from being a major hurdle to being actually pretty trivial to beat, as long as you have a couple of lives in reserve. My process for tackling this boss went like this:
18:38 - With no resources left, I die to this wave of bullets. But each death simply means another set of three bombs - more fuel for my point-blanking strategy.
20:07 - Another death, but with Satan Claws down to about 30% it's only a matter of time.
20:39 - With two lives to spare, Satan Claws is defeated.
21:30 - With Satan Claws banished to the World of Demons and theDragon Balls Wishing Notes all together, our heroes summon Shenron God and wish Mr Dior back to life. As in the original DS, there are two endings for each character - one where they ask Mr Dior for something, and one where they don't. In my first 1CC, I chose the "ask for something" ending, and I'll just say this - LMFAO if you think I'm putting that on my YouTube channel.
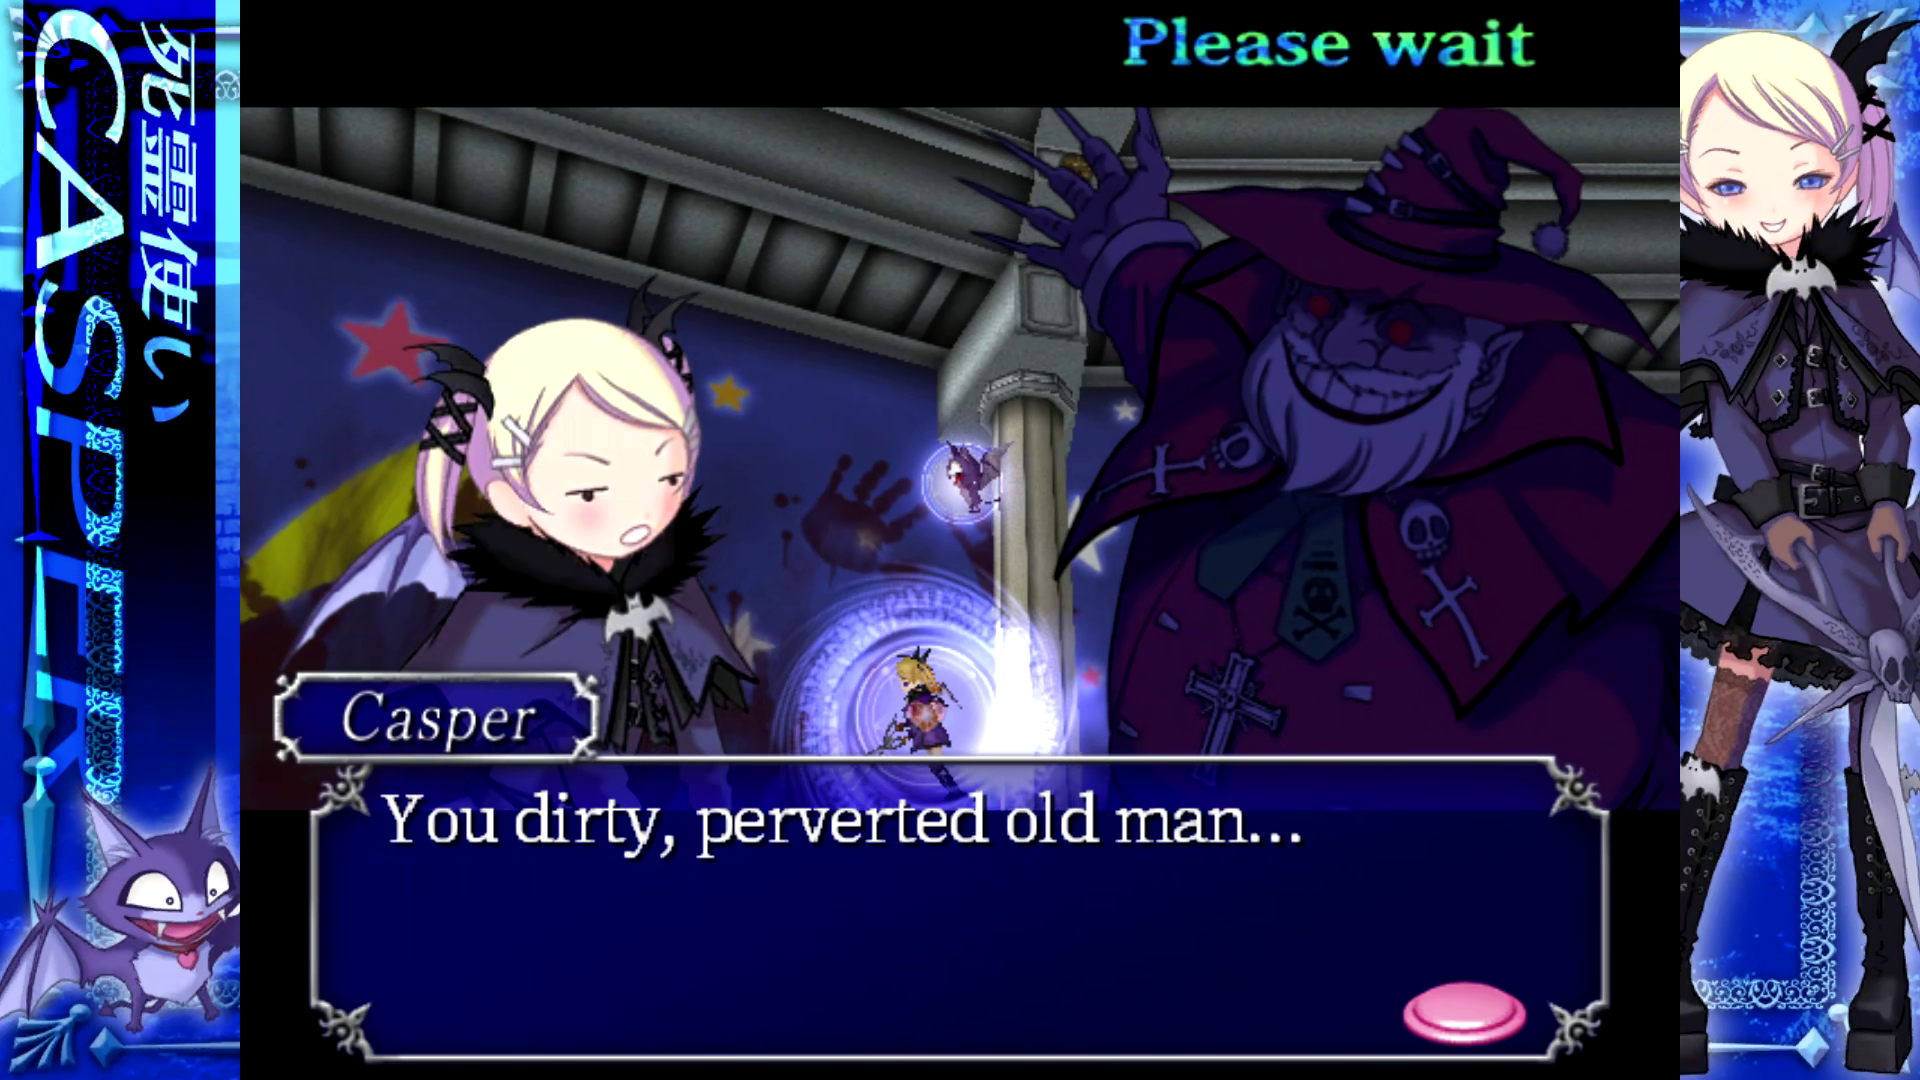
Is she referring to Satan Claws, or whoever came up with her "ask for something" ending?
24:42 - I can't find exact details about the clear bonus, but if I had to guess I'd say about 15 million for each remaining life, plus smaller points for remaining bombs and counters.
25:02 - At time of playing, this run is twelfth on the Steam leaderboards, with the top score at just over a billion. Of course, this game didn't start out on Steam, and there is video out there of a 1.5 billion run, while the world record stands at over 2 billion as per Shmups Wiki.
Conclusion: It's a decent game in its own right, but in most respects - obviously the graphics, but also the gameplay, character art, and music (although credit where it's due, the final stage theme is excellent) - it comes across as a watered-down verion of the original DS. Cave seemed to agree, and their initial plan for the Xbox 360 port included just X Mode (essentially version 5.00 of the game, with four different revisions - 1.00 to 4.00 - of the arcade game having been produced) and a weird Arrange Mode that I don't fully understand. At the last minute, version 4.00 of the arcade game was added, but it was clearly a rush-job, as basic features such as replays and practice mode are missing. Unfortunately, these issues aren't rectified in the Steam port.
I have two more games currently planned for this series, and then I'll see where I'll go from there. Until next time...
Unlike Cave's other games going back to 2004's Mushihimesama, which were powered by the CV1000 hardware, DSII ran on an all-new PC-based system and featured real-time 3D graphics for the first time in a Cave shmup. How did that work out? This was the only game to run on this hardware, and if I'm being generous, it looks to be visually on par with a Dreamcast game. Oh well.
But is there a good game underneath the lacklustre presentation? It's time to take a look at how an 11-year-old girl, her pet bat, and her magic scissors saved Christmas.
The controls are the same as the original: shoot left, shoot right, and bomb. Both shot buttons activate your power-up if it's available, and your lock shot if it's not. What's changed is the way in which your power-up is charged up. There are three different kinds of item - red rings, which are spawned by attacking with your normal shot and which build up your main counter (up to a maximum of 1,000, at which point your power-up becomes available), blue rings, which build up your sub-counter (the number added to the point values of items during a power-up, up to a maximum of 10,000 - and unlike the original DS, you keep it after your power-up ends) and silver rings, which build up both counters. Depending on your character, your option's shot will also spawn items.
A word of warning: compared to the original, information on this game - in English, at least - is much harder to come by. There's a very bare-bones page for the game on the Shmups Wiki, and a brief strategy guide posted on the Cave-STG forum (cross-posted to the Shmups Forum), but there are a lot of details missing, and as such, some of what you'll see here is guesswork on my part.
Anyway, on with the show:
0:00 - There are four selectable characters; Casper and Windia return from the original DS, and are joined by newcomers Supe and Lei.
0:10 - A quick introduction to the plot before the first stage. Satan Claws has attacked Mr Dior and made off with the
0:43 - From time to time, there are enemies in the background that can only be attacked with the lock shot.
0:48 - Casper is particularly good at leeching items off enemies.
1:00 - When your main counter is at 1,000 and you're ready to power up, some enemies release revenge bullets that can be absorbed by your option and converted into blue rings, at a cost of 1 to your main counter.
1:03 - For the first couple of stages, I use the power-up mainly for defensive purposes - as if it was an extra bomb. You'd think that this is the optimal way to play through the entire game if you're just going for a 1CC, but there are score-based extends at 40 million and 100 million - the latter of which takes a little effort to reach. The Detritus stage is particularly lucrative, and you definitely want to take advantage of that. (And in any case, the revenge bullets mean that you'll be activating your power-up pretty quickly if you're playing for safety.)
1:47 - Joy to the world, the boss has come... Whereas the original DS had a giant cow, DSII has Lily the giant reindeer, ridden by Satan Claws.
1:52 - When using your focus shot, you have an aura around your character which deals extra damage at close range, similar to the Dodonpachi series. This comes in very handy in boss battles.
2:55 - You know how in the early '80s, before they settled on calling parts of a game "levels" or "stages", they would use all sorts of different terms such as "boards", "patterns", "racks", "waves", and so on? Well, Cave is reviving that tradition by referring to this game's stages as "fields". All joking aside, DSII keeps the non-linear structure of the original, although there's no difficulty selection this time. In this run, I'm going to be boring and play the stages in B -> C -> D order.
3:00 - Not a whole lot to say about this stage - at least not until I reach the boss.
4:43 - I use a power-up for safety purposes as the falling masonry is surprisingly tricky to avoid (even though it only does half a point of damage).
5:06 - A planned bomb, as this is a relatively difficult pattern to dodge.
5:50 - Up until now I've activated my power-up whenever it's available and when there are revenge bullets on screen, but here (and for the rest of the game, pretty much), I'm going to make an effort to build up my sub-counter before doing so, to extract more value from my power-up. This is easy to do here, as these platforms act like the falling rocks in the volcano stage in the original DS, as you can leech copious amounts of items from them.
6:04 - With the sub-counter at over 6,000 and a cloud of revenge bullets approaching, I decide now is the time to cash in.
6:25 - Thanks to these platforms, it takes just a few seconds to recharge after my power-up ends.
7:01 - After entering the stage with just over 11 million, I obtain the 40 million extend.
7:19 - Another planned bomb - but if I destroyed it with my lock shot (and if I didn't already have full life), I would have picked up a half-point life refill.
7:36 - I find that Casper handles this boss particularly well.
7:51 - That said, I activate my power-up here as these rocks have caught me out on quite a few occasions.
8:34 - One benefit of clearing the previous boss so quickly is that my sub-counter starts the next stage at over 4,000 - it counts down quickly during boss battles, and is halved upon starting a new stage. As a result, I'll be able to make that much more progress towards the 100 million extend.
8:54 - This is the first hit I take all game.
9:44 - There's another life-up item available here if I kill this knight with the lock shot - but I actually didn't know about it at the time I played this.
10:31 - The first death of the run, thanks to an enemy collision. That life-up item sure would have come in handy here, right?
10:53 - The "Nice Older Man", Tamecos, arrives on the scene. How will he aid Casper on her quest?
10:55 - Uh... that's not very nice at all!
11:08 - MEEEEEHHHHHHHHHHHH
11:59 - The normal way to handle this attack is to quickly go over Tamecos' head, move to the left-hand side, and return to the bottom-right - but because there are a few bullets remaining from the previous wave of this attack, I decide to play it safe and use a bomb here (although in hindsight, this was not difficult to dodge).
13:32 - After a quick cutscene, the final stage begins.
13:47 - I hope you enjoy seeing chess pieces blow up, because those are the only emeies you'll see for the next three minutes or so.
14:21 - The power-up is available once again, but with the second extend still to be collected, I am holding off on using it until I have a good sub-counter - at least 5,000. To handle the revenge bullets until then, I position Casper's option in front of her with the focus shot, and keep it there to absorb bullets while using my normal shot.
14:42 - With 21 million until the extend, I activate the power-up.
14:59 - The power-up ends - still just over 12 million to go. Still plenty of time, though...
15:03 - It's getting a bit hectic, so I use my last bomb.
15:27 - The power-up is back on deck. I wait for some revenge bullets to appear...
15:32 - ... and activate.
15:48 - After this power-up ends, I'm just over 2 million away from the extend.
15:59 - I quickly charge up another power-up, and with the sub-counter at 10,000, the second extend is in the bag.
16:15 - Thanks to all the items I leeched off the high-HP enemies during that power-up, I gain over 20 million points. Either way, I can now go back to using my power-up more defensively.
16:45 - Entering the final stretch before Satan Claws now - with four lives, it's looking good.
17:04 - Staying close to the snake to kill it more quickly, and in so doing, avoid its tricky second pattern.
17:30 - Same deal for the second snake.
17:46 - Finally, we have reached Satan Claws. Let the epic struggle for the last Wishing Notes begin...
18:10 - ...well, actually, it proves to be a bit anticlimactic. On the surface, Satan Claws - particularly his second form - is a significant leap in difficulty compared to the rest of the game. But once you're aware that you can do more damage by point-blanking, he goes from being a major hurdle to being actually pretty trivial to beat, as long as you have a couple of lives in reserve. My process for tackling this boss went like this:
- Is the current bullet pattern difficult to dodge?
- If so, and I have a power-up available, I use it.
- If I don't have a power-up available, I use a bomb if I can, and use the post-bomb invincibility frames to go in and point-blank the boss (and leech some items while I'm at it, to charge up the next power-up).
- If I have neither a power-up nor a bomb available, or if I can easily dodge the pattern, then I just do it the old-fashioned way.
18:38 - With no resources left, I die to this wave of bullets. But each death simply means another set of three bombs - more fuel for my point-blanking strategy.
20:07 - Another death, but with Satan Claws down to about 30% it's only a matter of time.
20:39 - With two lives to spare, Satan Claws is defeated.
21:30 - With Satan Claws banished to the World of Demons and the
Is she referring to Satan Claws, or whoever came up with her "ask for something" ending?
24:42 - I can't find exact details about the clear bonus, but if I had to guess I'd say about 15 million for each remaining life, plus smaller points for remaining bombs and counters.
25:02 - At time of playing, this run is twelfth on the Steam leaderboards, with the top score at just over a billion. Of course, this game didn't start out on Steam, and there is video out there of a 1.5 billion run, while the world record stands at over 2 billion as per Shmups Wiki.
Conclusion: It's a decent game in its own right, but in most respects - obviously the graphics, but also the gameplay, character art, and music (although credit where it's due, the final stage theme is excellent) - it comes across as a watered-down verion of the original DS. Cave seemed to agree, and their initial plan for the Xbox 360 port included just X Mode (essentially version 5.00 of the game, with four different revisions - 1.00 to 4.00 - of the arcade game having been produced) and a weird Arrange Mode that I don't fully understand. At the last minute, version 4.00 of the arcade game was added, but it was clearly a rush-job, as basic features such as replays and practice mode are missing. Unfortunately, these issues aren't rectified in the Steam port.
I have two more games currently planned for this series, and then I'll see where I'll go from there. Until next time...